
This guide may include intermediate to advanced concepts or terminology.
What You’ll Need
Below are the prerequisites you’ll need to follow along with this guide:- a Tally account (free)
- a configured Resend integration in Avicenna (if you want to send an email)
1. Create a Tally Form
Create a new form
Log in to Tally and create a new form (let’s call it “Submit a Suggestion)
Add a question
Add a short answer or long answer question to your form (you can word the question however you wish)
2. Create a Listener Endpoint
Create a POST endpoint
From the Avicenna Dashboard, create a new 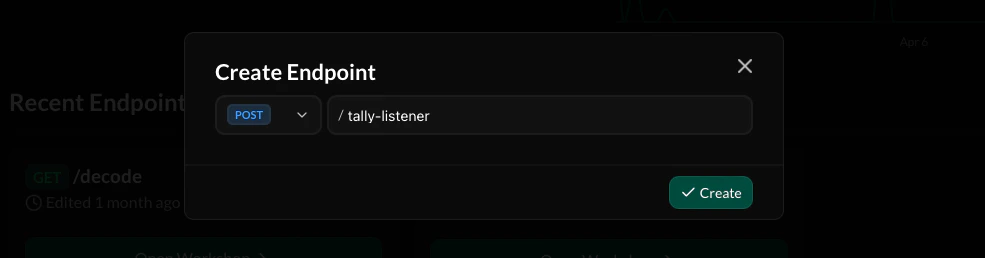
POST endpoint (we’ll name ours /tally-listener).Add request body keys
Tally will send information about the form submission via the request body. Add the 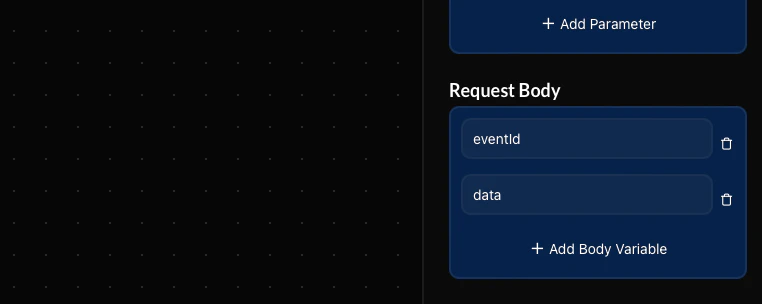
eventId and data keys to the request body. A full example of the request body Tally sends can be found here.
Add an action block
Add the Send Email action to your workflow and connect it to the base starting block.
Customize your email body
You can customize your email’s body however you like. Use the variables listed below to add content from the Tally form submission:
{body.data.fields.0.value}- Returns the answer to the first question in your form{body.eventId}- Returns the event ID of the Tally form submission
A full example and list of keys that are returned by Tally and can be accessed through variables can be found here.
Deploy your endpoint
Add a simple Respond action to tell Tally that you received the webhook. You’re then ready to deploy the endpoint!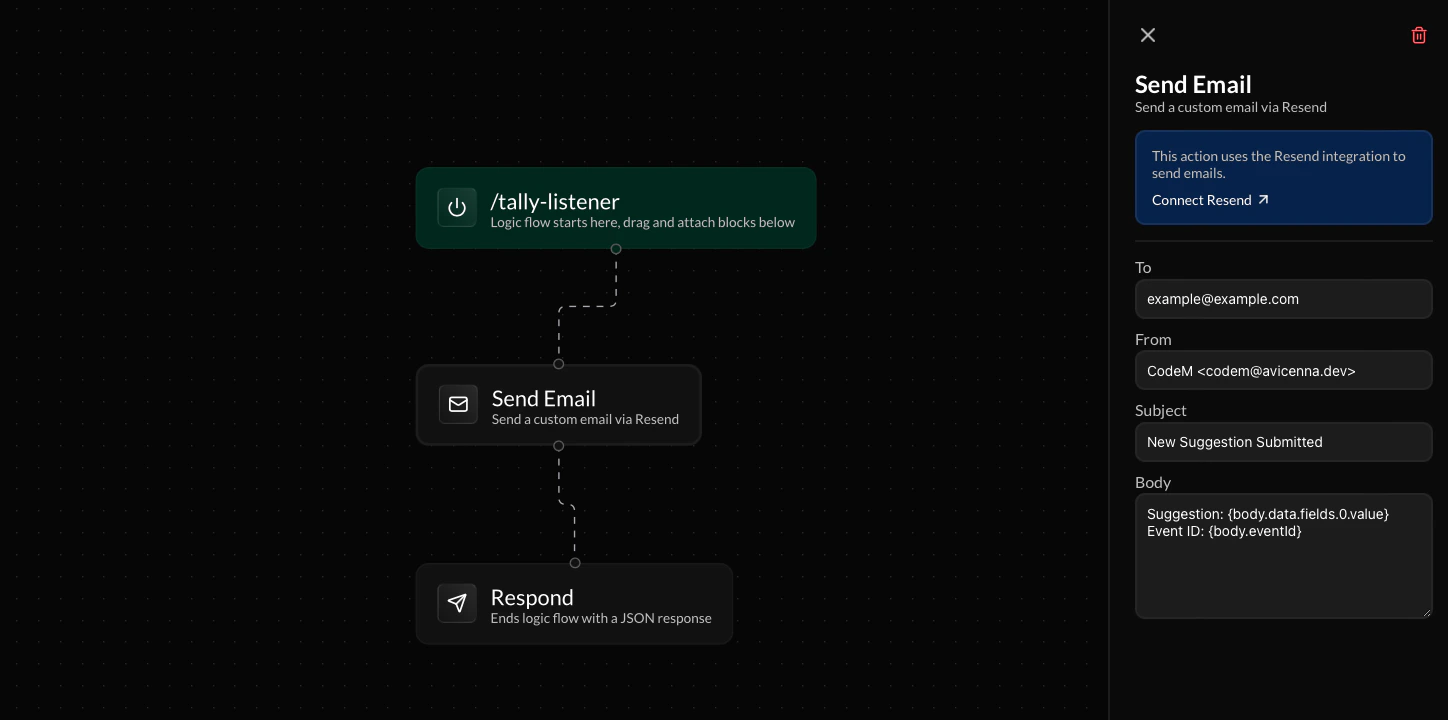
3. Configure Tally Webhook

Add Tally webhook integration
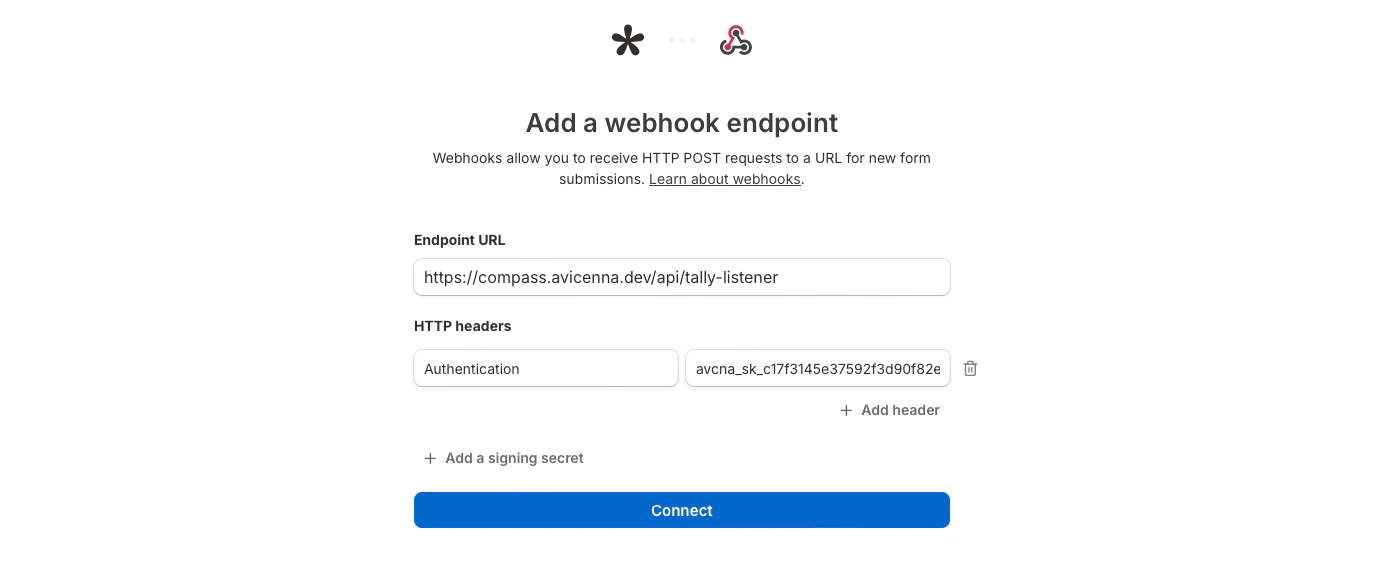
Navigate to the Integrations tab from the Tally settings page for your form. Click Connect under the “Webhooks” option.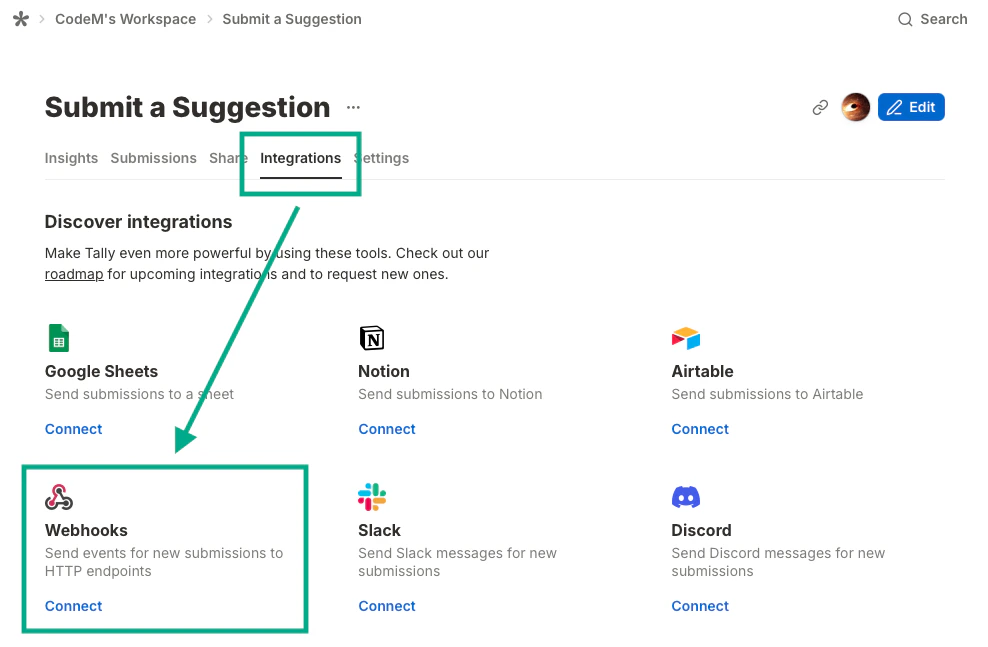
4. All done!
Try submitting a response to your Tally form and watch your Avicenna endpoint run! You can check your endpoint’s logs from the Avicenna Dashboard to verify that the webhook executed. Try out a working version of this Tally setup we’ve made here: https://tally.so/r/zxJLM8!Frequently Asked Questions
Do I need a paid Tally account?
Do I need a paid Tally account?
No, this setup works fine with Tally’s free plan!
Can I trigger something other than an email?
Can I trigger something other than an email?
Yes. Instead of the Send Email action, you can use the Send External Request action to call any third-party service or API of your choice.
How do I access answers from fields other than the first question?
How do I access answers from fields other than the first question?
You can use
{body.data.fields.1.value} for the second field, {body.data.fields.2.value} for the third, and so on. The full list of available keys is documented in Tally’s webhook reference.Do I need to add authentication to my endpoint?
Do I need to add authentication to my endpoint?
Authentication is optional. If your API requires it, you can add an API key in the HTTP Headers field when configuring the Tally webhook integration.