> ## Documentation Index
> Fetch the complete documentation index at: https://docs.avicenna.dev/llms.txt
> Use this file to discover all available pages before exploring further.
# Workshop Overview
> Get familiar with Avicenna Workshop for building endpoints
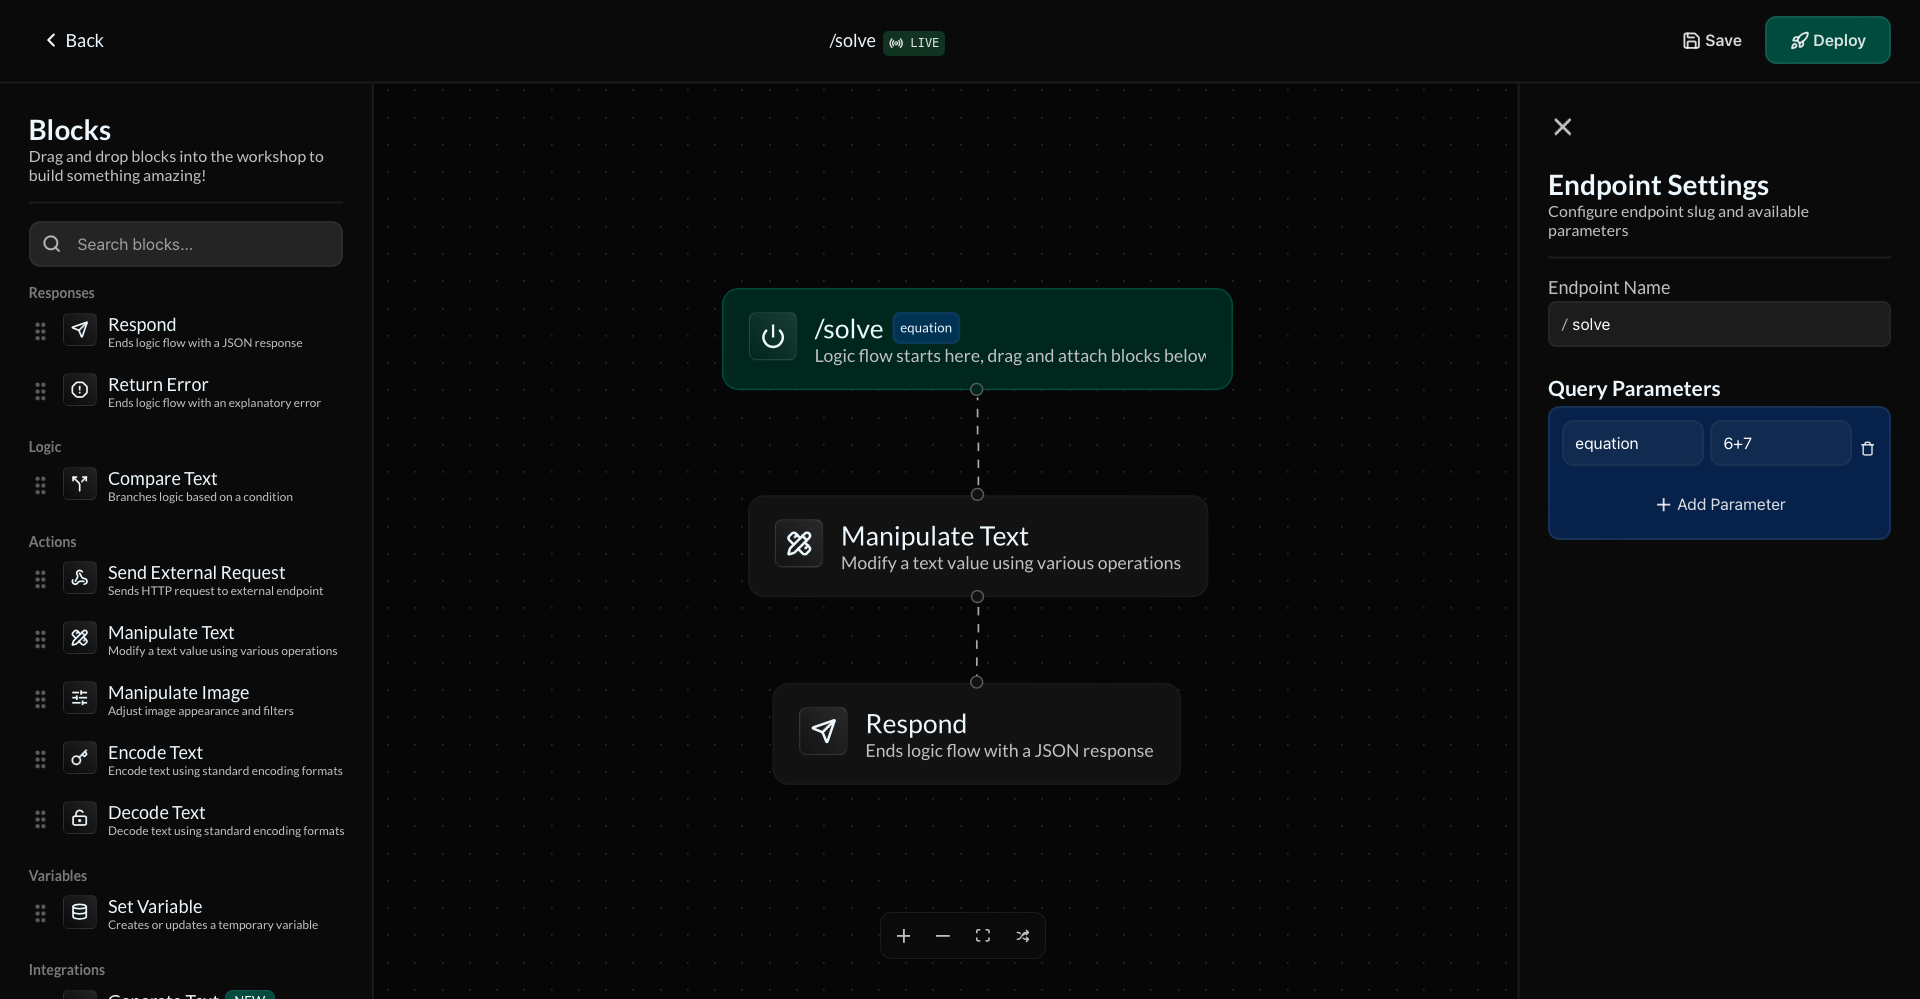
Build, edit, and deploy endpoints seamlessly from the Avicenna Workshop. The Workshop contains all the tools you need to fully customize and scale your API.
 ***
## Action Pool
The left sidebar of the Workshop contains a pool of all the available actions. Drag and drop an action block from the sidebar into the main workflow area to add it to your endpoint's flow.
Actions are divided into different organized categories. In addition, you can search through actions using the search bar.
***
## Action Pool
The left sidebar of the Workshop contains a pool of all the available actions. Drag and drop an action block from the sidebar into the main workflow area to add it to your endpoint's flow.
Actions are divided into different organized categories. In addition, you can search through actions using the search bar.
 ***
## Action Configuration
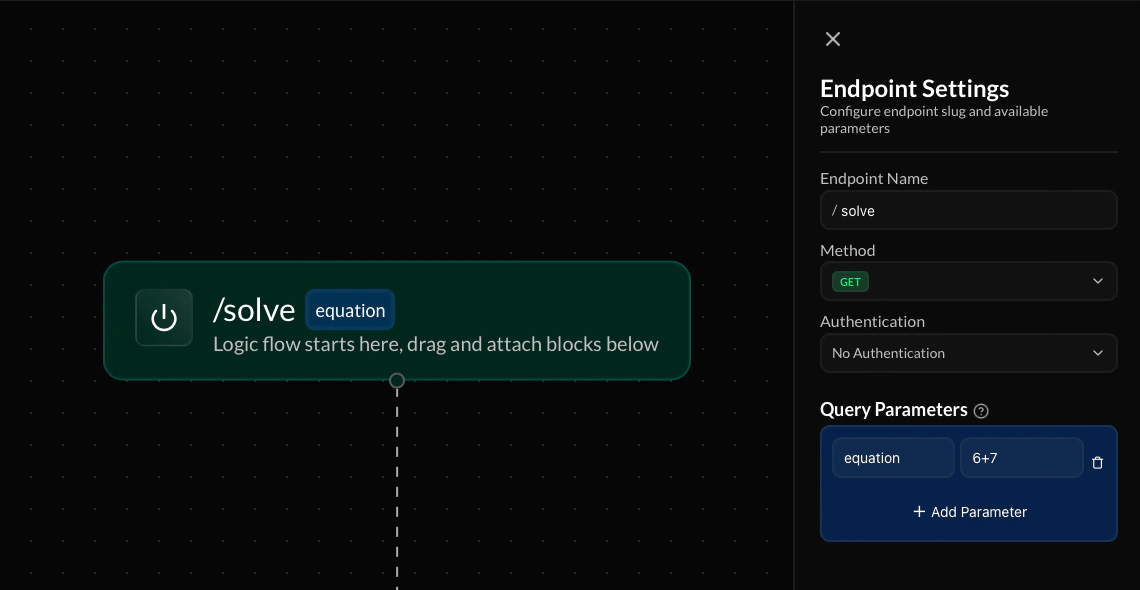
The right sidebar of the Workshop contains the configuration settings for every individual action in your workflow area. Select an action (by clicking on it) to view it's respective settings.
***
## Action Configuration
The right sidebar of the Workshop contains the configuration settings for every individual action in your workflow area. Select an action (by clicking on it) to view it's respective settings.
 ***
## Workflow Area
The main workflow area in the center of the Workshop is where all of your blocks can be connected to form logic trees that will be executed in order when a request is sent to the endpoint.
### Building Logic Trees
Start building your logic tree by dragging an action from the Action Pool sidebar and dropping it into the Workflow Area. You can then connect it to other blocks by dragging out from its connection nodes and dropping the connection onto another block's connection nodes.
***
## Workflow Area
The main workflow area in the center of the Workshop is where all of your blocks can be connected to form logic trees that will be executed in order when a request is sent to the endpoint.
### Building Logic Trees
Start building your logic tree by dragging an action from the Action Pool sidebar and dropping it into the Workflow Area. You can then connect it to other blocks by dragging out from its connection nodes and dropping the connection onto another block's connection nodes.
 ### Action Bar
The top navbar in the Workshop contains quick links to return to the main Dashboard, view your endpoint's deployment status, or save/deploy the endpoint.
To view additional information about your endpoint's deployment status, click on the **Live** tag next to the endpoint path. The endpoint's full live URL will also be shown there.
In addition to the Save and Deploy buttons in the Action Bar, you can use the quick keyboard shortcuts **⌘S** and **⌘D** respectively.
### Base Settings Block
The base green block at the start of the logic tree contains basic settings for the endpoint, including the endpoint name, [method](/methods), and [query parameters](/query-parameters). These can be edited directly from the Action Configuration sidebar when the Base Settings block is selected.
### Action Bar
The top navbar in the Workshop contains quick links to return to the main Dashboard, view your endpoint's deployment status, or save/deploy the endpoint.
To view additional information about your endpoint's deployment status, click on the **Live** tag next to the endpoint path. The endpoint's full live URL will also be shown there.
In addition to the Save and Deploy buttons in the Action Bar, you can use the quick keyboard shortcuts **⌘S** and **⌘D** respectively.
### Base Settings Block
The base green block at the start of the logic tree contains basic settings for the endpoint, including the endpoint name, [method](/methods), and [query parameters](/query-parameters). These can be edited directly from the Action Configuration sidebar when the Base Settings block is selected.
 ### Viewing Toolbar
At the bottom of the Workshop there is a small toolbar with various tools to adjust the Workshop's viewing settings, as described below:
* /**Zoom:** Adjust the zoom of the Workflow Area and logic tree only.
* **Fit Screen:** FIts the logic tree to fill the screen, adjusting zoom and positition as necessary.
* **Tidy Up:** Adjusts scattered blocks into an organized logic tree.
### Viewing Toolbar
At the bottom of the Workshop there is a small toolbar with various tools to adjust the Workshop's viewing settings, as described below:
* /**Zoom:** Adjust the zoom of the Workflow Area and logic tree only.
* **Fit Screen:** FIts the logic tree to fill the screen, adjusting zoom and positition as necessary.
* **Tidy Up:** Adjusts scattered blocks into an organized logic tree.
 ***
## Next Steps
Learn how to collect dynamic input in endpoint flows through parameters
***
## Next Steps
Learn how to collect dynamic input in endpoint flows through parameters