> ## Documentation Index
> Fetch the complete documentation index at: https://docs.avicenna.dev/llms.txt
> Use this file to discover all available pages before exploring further.
# Authentication
> Create and manage API keys used to authenticate requests to your endpoints.
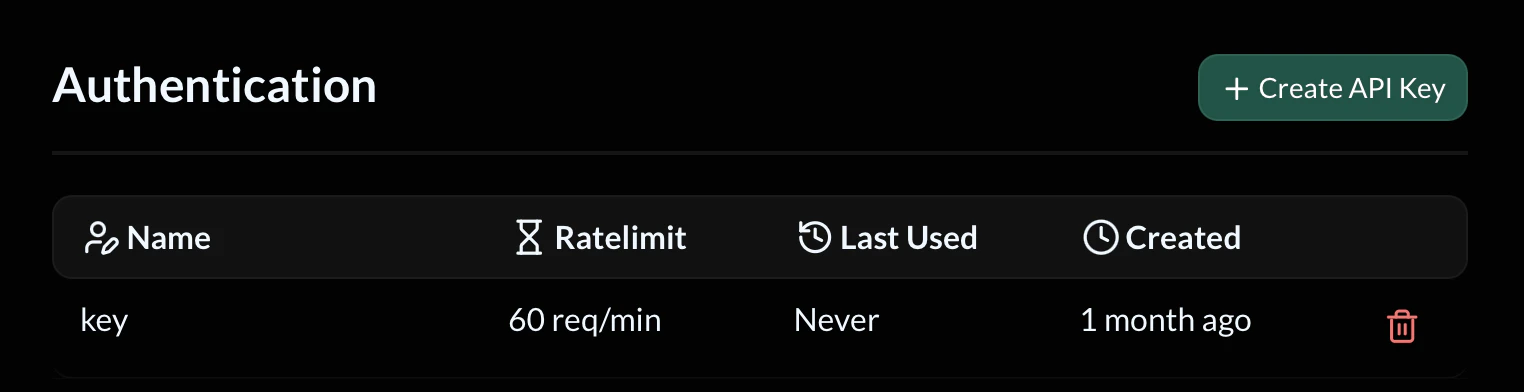
The **Authentication** page allows you to generate and manage **API keys** used to securely access your endpoints.
Every request sent to an Avicenna endpoint can be protected using an API key to ensure that only authorized clients can access your API.
 ***
## Overview
API keys act as credentials for your API.
When authentication is enabled for an endpoint, requests must include a valid API key or they will be rejected.
Each API key includes:
* **Name** – A reference name for identifying the key
* **Ratelimit** – Maximum allowed requests per minute
* **Last Used** – The last time the key was used in a request
* **Created** – When the key was generated
***
## Creating an API Key
To create a new API key:
1. Open the **Authentication** page
2. Click **Create API Key**
3. Enter a **Name** for the key
4. Set a **Rate limit**
5. Click **Add**
***
## Overview
API keys act as credentials for your API.
When authentication is enabled for an endpoint, requests must include a valid API key or they will be rejected.
Each API key includes:
* **Name** – A reference name for identifying the key
* **Ratelimit** – Maximum allowed requests per minute
* **Last Used** – The last time the key was used in a request
* **Created** – When the key was generated
***
## Creating an API Key
To create a new API key:
1. Open the **Authentication** page
2. Click **Create API Key**
3. Enter a **Name** for the key
4. Set a **Rate limit**
5. Click **Add**
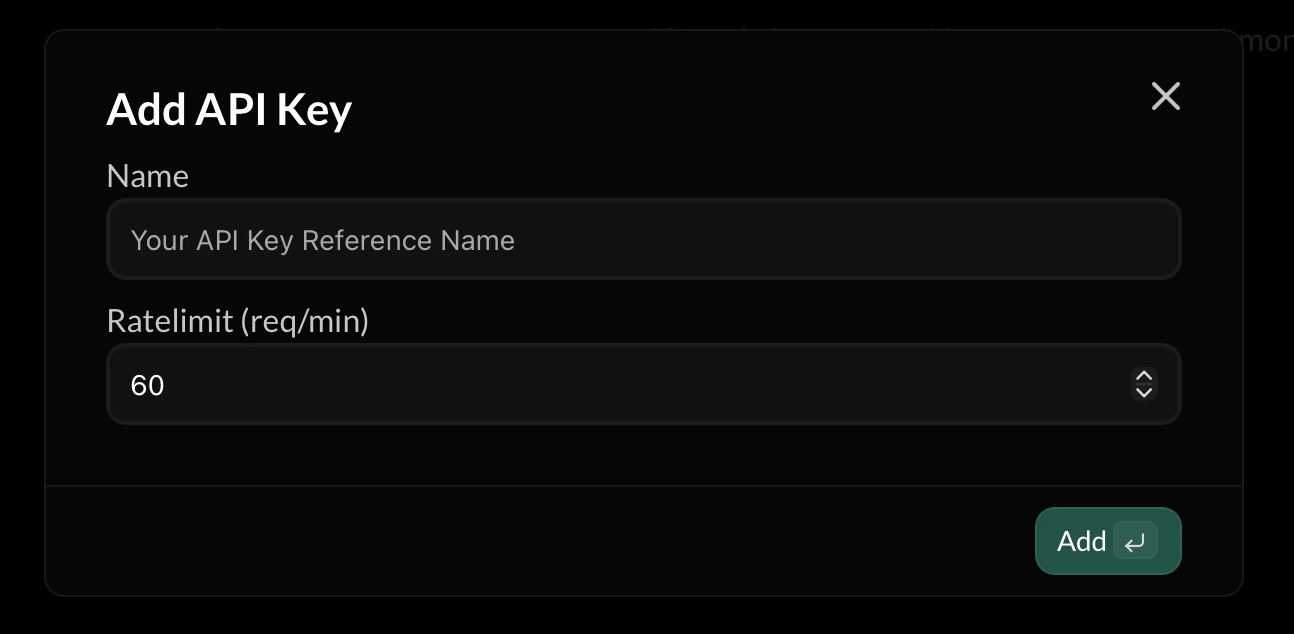 The key will immediately become active and can be used to authenticate requests.
***
## API Key Name
The **Name** field is used purely for identification.
Examples:
```
Production Server
Frontend App
Testing Environment
Internal Tools
```
Using clear names helps keep keys organized when managing multiple clients or environments.
***
## Rate Limiting
Each key can have its own **rate limit**, measured in **requests per minute**.
Example:
```
60 req/min
```
Rate limits help protect your API from:
* Abuse
* Traffic spikes
* Misconfigured clients
* Infinite request loops
If a client exceeds the allowed rate, the request will be rejected.
***
## Using an API Key
To authenticate a request, include your API key in the request headers.
Example:
```
Authorization: Bearer YOUR_API_KEY
```
Example request:
```bash theme={null}
curl https://your-endpoint.avicenna.dev/test \
-H "Authorization: Bearer YOUR_API_KEY"
```
If the key is valid and within its rate limit, the request will be processed normally.
***
## Last Used
The **Last Used** field shows when the key was most recently used.
This helps you:
* Identify inactive keys
* Detect unexpected usage
* Monitor API access patterns
***
## Deleting API Keys
You can delete an API key at any time using the **delete icon** next to the key.
Once deleted:
* The key **immediately stops working**
* Any clients using it will receive authentication errors
If a key is compromised, delete it immediately and generate a new one.
***
## Security Practices
To keep your API secure:
* Never expose API keys in public repositories
* Do not embed keys directly in frontend applications
* Rotate keys periodically
* Use separate keys for different services
If you believe a key has been leaked, delete it immediately.
***
## When to Use Authentication
Authentication should be enabled when:
* Your API is used by **private services**
* You need to **limit access**
* You want to **rate-limit clients**
* Your API handles **sensitive operations**
Public endpoints may not require authentication, but most production APIs should enable it.
The key will immediately become active and can be used to authenticate requests.
***
## API Key Name
The **Name** field is used purely for identification.
Examples:
```
Production Server
Frontend App
Testing Environment
Internal Tools
```
Using clear names helps keep keys organized when managing multiple clients or environments.
***
## Rate Limiting
Each key can have its own **rate limit**, measured in **requests per minute**.
Example:
```
60 req/min
```
Rate limits help protect your API from:
* Abuse
* Traffic spikes
* Misconfigured clients
* Infinite request loops
If a client exceeds the allowed rate, the request will be rejected.
***
## Using an API Key
To authenticate a request, include your API key in the request headers.
Example:
```
Authorization: Bearer YOUR_API_KEY
```
Example request:
```bash theme={null}
curl https://your-endpoint.avicenna.dev/test \
-H "Authorization: Bearer YOUR_API_KEY"
```
If the key is valid and within its rate limit, the request will be processed normally.
***
## Last Used
The **Last Used** field shows when the key was most recently used.
This helps you:
* Identify inactive keys
* Detect unexpected usage
* Monitor API access patterns
***
## Deleting API Keys
You can delete an API key at any time using the **delete icon** next to the key.
Once deleted:
* The key **immediately stops working**
* Any clients using it will receive authentication errors
If a key is compromised, delete it immediately and generate a new one.
***
## Security Practices
To keep your API secure:
* Never expose API keys in public repositories
* Do not embed keys directly in frontend applications
* Rotate keys periodically
* Use separate keys for different services
If you believe a key has been leaked, delete it immediately.
***
## When to Use Authentication
Authentication should be enabled when:
* Your API is used by **private services**
* You need to **limit access**
* You want to **rate-limit clients**
* Your API handles **sensitive operations**
Public endpoints may not require authentication, but most production APIs should enable it.